
Hello there, how’d you like to learn about version control systems and Github ? So welcome to the part 1 of the Github and chill. In this section, I will be talking about,
- What is version control ?
- What is GIT?
- How to install GIT
- Common commands in GIT
What is Version Control – Version control is a system that records changes to a file or set of files over time so that you can recall specific versions later. Using a Version control system generally means that if you screw things up or lose files, you can easily recover.
What is GIT – GIT is a version control tool that saves changes to group of files that you can revert back if needed.
There are different types of version control tools.
- Local version control tool – This saves changes to files in a database
- Centralized version control tool – This saves changes to a shared server
- Distributed version control tool –
- Allows for easier sharing of files then local version control system and also eliminates problems that could occur if access to the server is lost under a centralized version control system.
- Distributed version control clients have a complete backup of the files on their computer. If the server is lost the client just waits to regain contact and then uploads changes.
When you commit changes to files, Git stores a reference of what the files look like at that moment. If a file isn’t changed it isn’t stored again. Each client has a complete history of all changes stored locally. The client can also access all changes made to the files historically with a simple command. Also those files cannot be changed without Git knowing.
Basically in GIT, file transition take place between 3 different states
- Modified files – Files that have been recently changed
- Staged files – Files which have been marked to be saved
- Committed files – Files which are those that have been saved already
GIT saves all these files to a directory as a compressed database using Common commands. And then your will be able to modify those files in the working directory. You then can notify that you want saved changes in the staging area. And then of cause after you commit file changes. they are saved to the GIT directory.
Well, you now know what the exactly is going on in GIT right ? So, let’s see how to install GIT in windows.
-
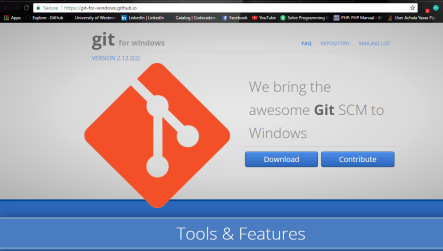
Inside of windows we are going to go to this address
-
Then download the GIT SCM (Software Configuration Management) to windows. (Just hit Next to everything along the install process ! yeah perfectly fine !)
- After clicking on the finish button at the end of the installation type ‘GIT’ on your search windows and specifically click on ‘GIT bash’.

- Okay, Your terminal will get open ! The very first thing i’m going to type in here is,
git config –global user.name “Achala007”
- This going to allow you to track who has changed files inside your data base. Then define your email too.
git config –global user.email achalayasas007@gmail.com
- You have to define a text editor which will be useful later on (to write commit messages). I will use the Vim editor. To define this, type
git config –global core.editor “vim”
- If you want to check the settings that you have defined above, type
git config –list

- If you want to get all the different things that you can get help on, type
git help

- If you specifically want to get the help on ‘add’, type
git help add
- Then you will be directed to here,

- Tracking a directory – Think that if you want to start saving certain files inside a folder or a directory on your computer, the very first thing you are going to do is actually go to that directory.
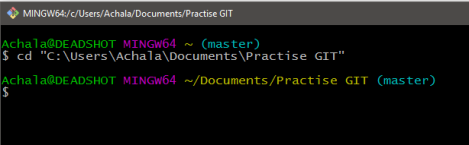
- If you want to change directory type,
cd “My Documents”
- Put inverted commas if your directory name contains spaces !
- If you want to show everything in the directory, type
ls -a
- Here I have created a directory in ‘C:\Users\Achala\Documents\Practise GIT’ location to proceed with the process.
- If you want to start saving files in this directory, type
git init
- Then a .git file will be created in the directory

- Tracking a file – If you want to start tracking changes in specific files you can do it by typing
-
git add * – this tracks all the files
-
git add *.java – this tracks all the java files
-
- Here in my GIT practice directory I have created a xml file as Hello.xml and I’m going to start tracking changes in this specific file. To start tracking, type
git add Hello.xml
- Now if I want to commit the Hello.xml file that I just typed in , what I have to do is type,
git commit -m ‘Initial project version’

- Here if you want to set a commit message you have to type commit -m. More than likely you wouldn’t be doing that all the time.
- Now if you want to get the status on all of your files, type
git status

- Now let’s see the process of staging the file. Go to the Hello.xml and make a little change.

- So if I want to show what has changed, Type
git diff

- As you can see the the changes we did are presented in front of the + sign.
- If however I want to stage this file which means I plan on cmmiting it very soon thereafter, type
git add Hello.xml
- And this file is now staged. This is what called staging. So basically I have staged this file and these are going to be committed and there’s going to be 2 different versions on the git system.
- And you can see that if I type,
git diff –cached
- It will exactly shows what has been staged and what has not.
- Now just commit the changes
git commit
- What happens is that an actual file will be opened up in your system. Here I’m using the VIM editor as defined
- Hit Esc key
- Hit i (In the lower left ‘INSERT’ will pop up)

- Then inside the editor I’m going to note what I have changed.

- Hit Esc key
- Then go down to the very bottom and type :wq this is going to save the changes you just did. It will show that the file has been changed

- If you want to skip the staging and writing those commit messages, what you have to do is just do a little change in the file Hello.xml (I have added a Greet3 ) again and type,
commit -a -m ‘added greet3’

- This is a shorthand way of both skipping the stage and skipping the commit message.
- Next I’m going to create a file in the directory so that I can show how to remove a file. (For this I have created a file as Text.txt in the same directory). After creating a file, type
git add Test.txt
- And to remove, type
git rm test.txt
- And here there will be message saying that it is in the staging area and this cannot be deleted unless you do a force removal. For a force removal, type
git rm -f Test.txt
- Then the file will get deleted.


- If you want to dislay all the previous commit messages made, type
git log

There are more commands in GIT, and I have mentioned the most commonly used ones. So this is the first part of Github and Chill ! In the next part I will be explaining things like,
- Remote Repositories
- GitHub
- Push
- Pull
- Aliases
- Tags …
Well that’s it !! Hope I made sense in to you guys on what is Version control, GIT and on the common commands. If you have anything to be clarified you can drop a comment or contact me. Thank You !

Good read
LikeLike
Good Job
LikeLike
Good read ✌
LikeLike
Useful. Keep up the good work x
LikeLike
Great stuff! Keep it up!
LikeLike
job Done well!!!
LikeLike
Good One
LikeLike
Important stuff! http://hasithase.blogspot.com/2017/04/git-hub.html (Sinhala version)
LikeLike
Great job!! Keep up the good work 👍👍
LikeLike
Great job! Keep it up
LikeLike
Well done!
LikeLike
Good job
LikeLike
Wow.good read👌
LikeLike
Luv to try this 👍👍👍👍👍
LikeLike
Good work
LikeLike
Great..Keep it up
LikeLike